Tuesday, July 31, 2012

Cinna-Choc-Nanner Quesedillas

OK, so, I normally don't do desserts. However, this one is super easy and super tasty. I had to share.

1. Lightly butter one side of a taco or fajita size flour tortilla (I used olive oil spread)

2. Place butter-side down in a skillet treated with nonstick spray over low-med heat

3. Place milk chocolate chips evenly on tortilla

4. Slice half of a small banana and place evenly on one half of the tortilla

5. Sprinkle light brown sugar over everything (about 1/2 Tbsp)

6. Generously sprinkle cinnamon over everything

7. When chocolate begins melting, fold the tortilla in half - one side over on the other - and lightly sprinkle cinnamon

8. Flip and do the same thing to the other side

9. Cook until both sides are lightly browned and crisp - to your liking

10. Take the other half of the banana and cut it long-ways down the middle, sprinkle with cinnamon

11. Place cinnamon side down in the skillet and cook for 1-2 minutes, turn and cook another couple of minutes

12. Serve quesedilla with the bananas on top after adding a small amount of chocolate syrup over bananas

YUM!
Published with Blogger-droid v2.0.6

Stuffed Mushrooms & Marinated Roasted Zucchini

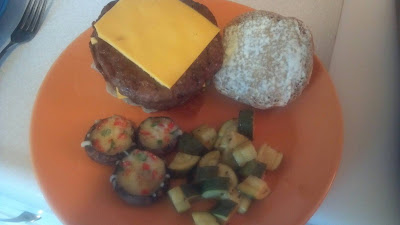
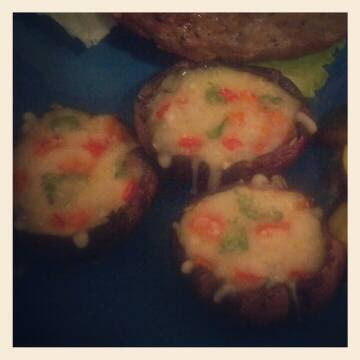
Ryan grilled burgers last night that came from my Uncle's cows - soooo good. For our sides, he stuffed and grilled baby bella mushrooms and I roasted zucchini. It was all DELICIOUS.

MUSHROOMS:

1. Wash and remove stems from mushrooms (6)
2. Grate 1/2 cup of cheese (he used pepper jack)
3. Finely dice 1 red baby bell pepper
4. Put an even amount of cheese in each mushroom
5. Top cheese with bell peppers and lightly sprinkle cilantro
6. Grill or bake til cheese melts

ZUCCHINI:

1. Wash and dice one medium zucchini
2. Place in shallow baking dish
3. Pour about 1 Tbsp zesty Italian dressing over zucchini and a few light dashes of worchestershire sauce
4. Place in oven at 425
5. After 10 minutes, stir, and cook for another 5 minutes. (For bigger/thicker pieces, cook 10 more minutes.)

You can always use difference cheeses or veggies to stuff the mushrooms or different dressings/marinades on the zucchini. Whatever you like will do!
Published with Blogger-droid v2.0.6

Monday, July 30, 2012

Crockpot Mexican Chicken

Crockpots are the best! Set it and forget it. Plus, usually, you only need a few ingredients.

Here's what you need for Mexican Chicken:
1 lb Boneless, skinless chicken breasts, trimmed
1 can Enchilada sauce
1 can Rotel (I used Lime Cilantro Rotel)
1 packet Taco Seasoning (lower sodium version)
1 bunch of Green onions, diced
1 cup Shredded Mexican blend cheese
1 can Bush's seasoned black beans
Fresh cilantro
Tortillas, rice and/or tortilla chips

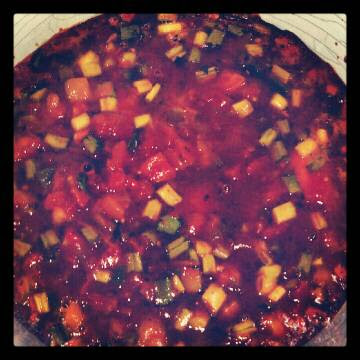
1. Combine enchilada sauce, taco seasoning, rotel and onions in a bowl
2. Place chicken in crock pot
3. Pour sauce over chicken
4. Turn crockpot on high

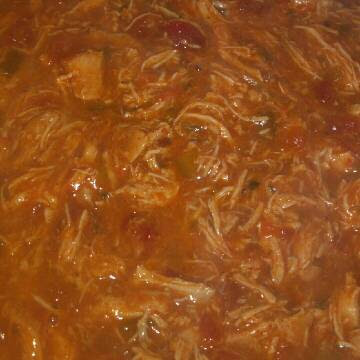
5. After a couple of hours, see if chicken can easily be shredded and shred with two forks

6. After another hour to an hour and a half, add cheese, stir and turn down to low

7. Turn crockpot off after about 4-4.5 hours
8. Open black beans and warm over the stove for about 5-10 minutes and warm tortillas according to package directions

Serve over rice, in a soft tortilla or with tortilla chips.

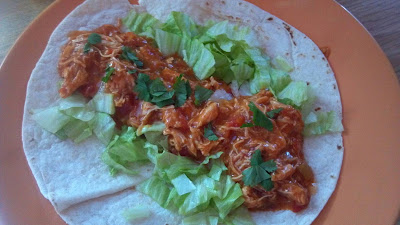
I put the chicken in a soft tortilla (fajita size), topped with cilantro and chopped lettuce.

Ryan ate his fajita style - putting chicken, rice and beans in a tortilla. (The rice was brown and cooked in water, according to directions, with a chicken bouillon cube.)

Make your own version and let us know how it goes!
Published with Blogger-droid v2.0.6

Friday, July 13, 2012

Sweet Garlicky Chicken Breasts & Spicy Parmesan Crusted Zucchini

I found this chicken recipe on Pinterest, but I changed a few things. So, this is my version of it. :-)

INGREDIENTS:

4 small or 2 large chicken breasts
1/2 tsp Olive oil
2 Tbsp minced garlic
4 Tbsp brown sugar
Salt and black pepper to taste
1 Large zucchini or 2 Med/small
2 Egg whites
Panko bread crumbs
Grated Parmesan cheese
Tony Chachere's More Spice Seasoning

DIRECTIONS:

1. Warm oil in small skillet over med-low heat and preheat oven to 350

2. Add garlic to skillet once oil is hot and saute until garlic begins browning and then remove from heat

3. While garlic is being sauteed, peel zucchini and cut into spears about 1.5-2 inches long

4. Liberally sprinkle Panko on a plate and add parmesan (lightly) and Chachere's (a few dashes - depending how spicy you like it); stir with your hands to combine ingredients more evenly

5. Dip spear in egg white, coat it in the Panko mixture and place in a glass baking dish covered with foil

6. Continue the previous step until you go through all the zucchini

7. Combine sauteed garlic with brown sugar

8. Place chicken in a glass baking dish covered with foil that is treated with nonstick spray

9. Spoon brown sugar-garlic mixture onto each chicken breast and spread evenly over each one; Salt and pepper to your taste

10. Put both dishes in the oven and bake for 30 minutes; after 30 minutes, you can turn on the broiler if the sugar needs to melt more or if the zucchini sticks aren't browned enough

I really liked the taste of the garlic and brown sugar together! I think I'd like to add Chachere's to this the next time I make it. I think the sweet with spicy would be awesome. (But, I'd definitely have to serve it with a non-spicy side!)

We loved this zucchini! I think I'll try it with other spices/seasoning, too. Maybe even dry ranch mix...?
Published with Blogger-droid v2.0.6

Wednesday, July 11, 2012

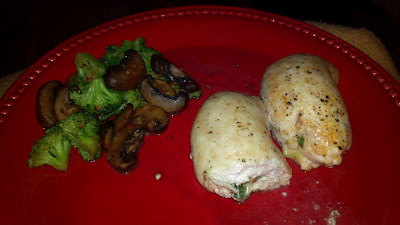
Baked Chicken Breasts Stuffed with Jalapeno Jack and Spinach

Man, oh, man...was this a delicious meal!

INGREDIENTS:

4 Small or 2 large chicken breasts
***I strongly recommend The Choppin' Block for chicken breasts. They're not huge, which means they're hormone-free, and it makes them much easier to cook. Plus, they taste great and have a really good texture.
1 Cup shredded Jalapeno Jack, or if you don't like the spice, you can use regular Jack cheese
1 Large handful of baby spinach
1/2 Tbsp Panko bread crumbs
1Tbsp olive oil
Seasoning Salt and Black Pepper to taste
1 Cup broccoli
1 Cup baby Bella mushrooms, sliced
1/2 Tbsp minced garlic
1 Tbsp butter

DIRECTIONS:

1. Slice down the thickest side of the chicken breast so that you can "open it up"

2. Put 1/4 of the shredded cheese (or 1/2 if you're using the large breasts) on the "opened-up" chicken breasts

3. Put 1/4 of the spinach (or 1/2) on top of the cheese

4. Lightly sprinkle some Panko on the spinach

5. Fold chicken over so that it's back together/"closed" and use toothpicks to tightly secure it

6. Sprinkle seasoning salt and black pepper on top of the chicken (amount is up to you)

7. Follow steps 1-6 for the remaining chicken and place chicken in glass baking dish (treated with nonstick spray)

8. Bake at 350 for approximately 30 minutes

9. About halfway through cook time, brush olive oil (or melted butter) on top of chicken to get it to come to a golden brown color

9. Blanch broccoli in water on the stove for about 2 minutes

10. Remove broccoli from hot water, place in a colander, and run cool water over it (to stop the cooking)

11. Put butter and minced garlic in a skillet and saute garlic for a couple of minutes over med-low to med heat

12. Add mushrooms to skillet and saute for about 5 minutes, add a few dashes of soy sauce and stir occasionally

13. Add broccoli to the skillet, stir broccoli, mushrooms, garlic together and saute for about 5 more minutes

SERVE!

I LOVED the broccoli and mushrooms cooked together this way! We will definitely make this side again and will probably try it with other sauces/ spices.

The chicken was perfect! You could also grill them...once the "burn ban" is over! :-/ If Ryan could have grilled them, that's probably what he would've done, but they turned out great baked.

Try using different cheeses and veggies to stuff the chicken, if you like. Feta would've been good with the spinach, also. (Ryan has done that combo before when making chicken breasts spirals.) If you try this recipe or your own variation, let us know how it turns out!
Published with Blogger-droid v2.0.6

Tuesday, July 10, 2012

Baked Sesame Ginger Salmon with Brown Rice & Teriyaki Roasted Vegetables

Did someone say EASY?

The title may sound complicated, but if you can open a bottle of marinade and turn on an oven, you can make this meal.

DIRECTIONS:

1. Put thawed or fresh salmon fillets in a Ziploc bag and coat each side with Sesame Ginger 30-Minute Marinade. (We usually have the generic brand.) Place the bags in the fridge to marinate for at least 30 minutes.

2. Cube one small zucchini, one small yellow squash and dice half of a medium-sized yellow onion. Put in a bowl and add dashes of teriyaki sauce until the veggies are lightly coated. Sprinkle them with any kind of seasoning salt, garlic powder, black pepper and stir. Place in the refrigerator until you're ready to roast them.

3. Put 1/2 Cup of brown rice (not instant) with a few sprinkles of garlic powder and 1 and 1/3 Cup of salted beef stock in a small pot on the stove. Bring it to a boil, cover, reduce heat to med-low and simmer for about 30 minutes - until all the liquid is gone.

4. Preheat oven to 375 and put salmon in a glass dish lined with foil treated with nonstick spray.

5. Place veggies on a nonstick metal baking pan and roast in oven for about 20-25 minutes, stirring once.

6. Halfway through the veggie cook time, put the salmon in the oven, too. It should take 12-15 minutes depending on thickness. (When salmon is ready, it should flake easily.)

7. When everything is ready, plate it and sprinkle fish and rice with parsley.

8. SERVE AND ENJOY.

Published with Blogger-droid v2.0.6

Monday, July 9, 2012

Lasagna with Homemade Meat and Garden Vegetable Marinara

INGREDIENTS:
2 Tbsp olive oil
2 yellow onions, diced
1 green bell pepper, diced
2 carrots, diced
2 Tbsp minced garlic
2 celery stalks with leaves, diced
1/2 Tbsp each of thyme, oregano, basil and parsley
1/2 Cup red wine
2 (.28 oz) Cans crushed tomatoes
1 Bay leaf
1 Tbsp sugar
Salt and pepper to taste
1 lb Ground beef, lean (or any ground meat)
9 Whole wheat lasagna noodles
1/2-1 Cup ricotta
4 Cups Italian blend shredded cheese

DIRECTIONS:
1. Warm olive oil in soup pot over medium heat
2. Add onions first and saute for about 5 minutes, then, add green pepper, carrots and celery
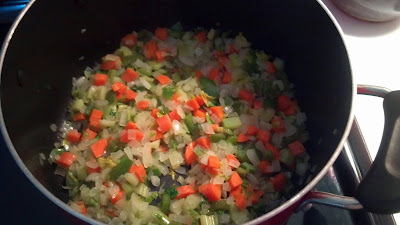
3. Cook veggies, stirring occasionally, until the onions are clear and other veggies are starting to get soft
4. Add garlic and spices, cook for about 5 minutes, stirring occasionally

5. Pour in wine, stirring and scraping the bottom of the pan and cook for 2-3 minutes
6. Add the cans of tomatoes, do not drain, and bring to a light simmer
7. While bringing sauce to simmer, brown meat in a skillet and drain
8. Put meat in food processor to get a fine and even texture (optional)
9. Add meat, bay leaf, salt, pepper and sugar to sauce and bring to a low simmer (taste the sauce to see if you need to add more salt, pepper or sugar - adding just a small amount at a time between tasting)
10. Simmer for at least one hour

11. After sauce is ready, set it aside and cook pasta as instructed on the box
12. Pat pasta dry after cooking and straining water
13. Turn oven on 375
14. Spread a cup of sauce on the bottom of a 9x11 glass baking dish evenly
15. Layer 3 noodles (overlapping if needed) over sauce
16. Add sauce to cover each noodle, spreading evenly (amount is up to you)
17. Sprinkle shredded cheese over the sauce, cover the sauce really well
18. Place dollops of ricotta over the shredded cheese (in a line with the way the noodles are placed)
19. Put another layer of 3 noodles over the ricotta and follow the same steps ( sauce, shredded cheese, ricotta)
20. Add the last layer of 3 noodles, sauce and shredded cheese (put sauce and cheese in any gaps between the dish edge and the pasta)
21. Tent foil over the top to cover without touching the lasagna
22. Cook on middle rack in over for 45 minutes, uncover and cook for 5 more minutes 23. Remove and let sit for 5-10 minutes

24. SERVE

We should've had a salad with this, but instead we had Pepperidge Farm Garlic 5-Cheese Texas Toast. YUMMY.
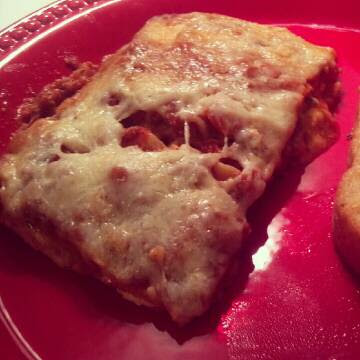
You can make this sauce for any pasta, also...spaghetti, ravioli, etc. It is time-consuming but easy and worth it!
Published with Blogger-droid v2.0.6